This post may contain affiliate links. Please see our disclosure policy.

Anyone else remember that joyful feeling that came over you when you got the keys to your first car or house? I am experiencing those feelings all over again because today we officially got the keys to our FIRST real office! As a lot of you know, we’ve been looking for SO long! This means Starbucks is NO longer our HQ! ;) There are so many more details that I cannot wait to share with you. I can hardly wait to decorate the studio. I have a running list of ideas. I promise I will post a blog post dedicated to the entire revamp of the space. Let’s just say, Andy is going to have his work cut out for sure! ;)

So now I have A LOT of keys on my key ring. ;) Usually when I have to tell a key apart, I will add a little colored nail polish to the top of my keys to know the difference. One of the strategies I love to think about when creating concepts for Best Friends For Frosting is “What is a frequent problem I deal with and how can I solve this?” And that was when the idea of these painted keys was born!

As spring 2017 is already here, I thought this project would be PERFECT for my own version of spring cleaning. No more getting my parent’s Air BNB key mixed up with my house keys for this girl! ;) I took some of my favorite trendy patterns and painted them on the keys! You can never go wrong with palm leaves, polka dots, and dalmation prints! I guess it’s just the Kate Spade / Lilly Pulitzer / J.Crew in me all coming out! ;)
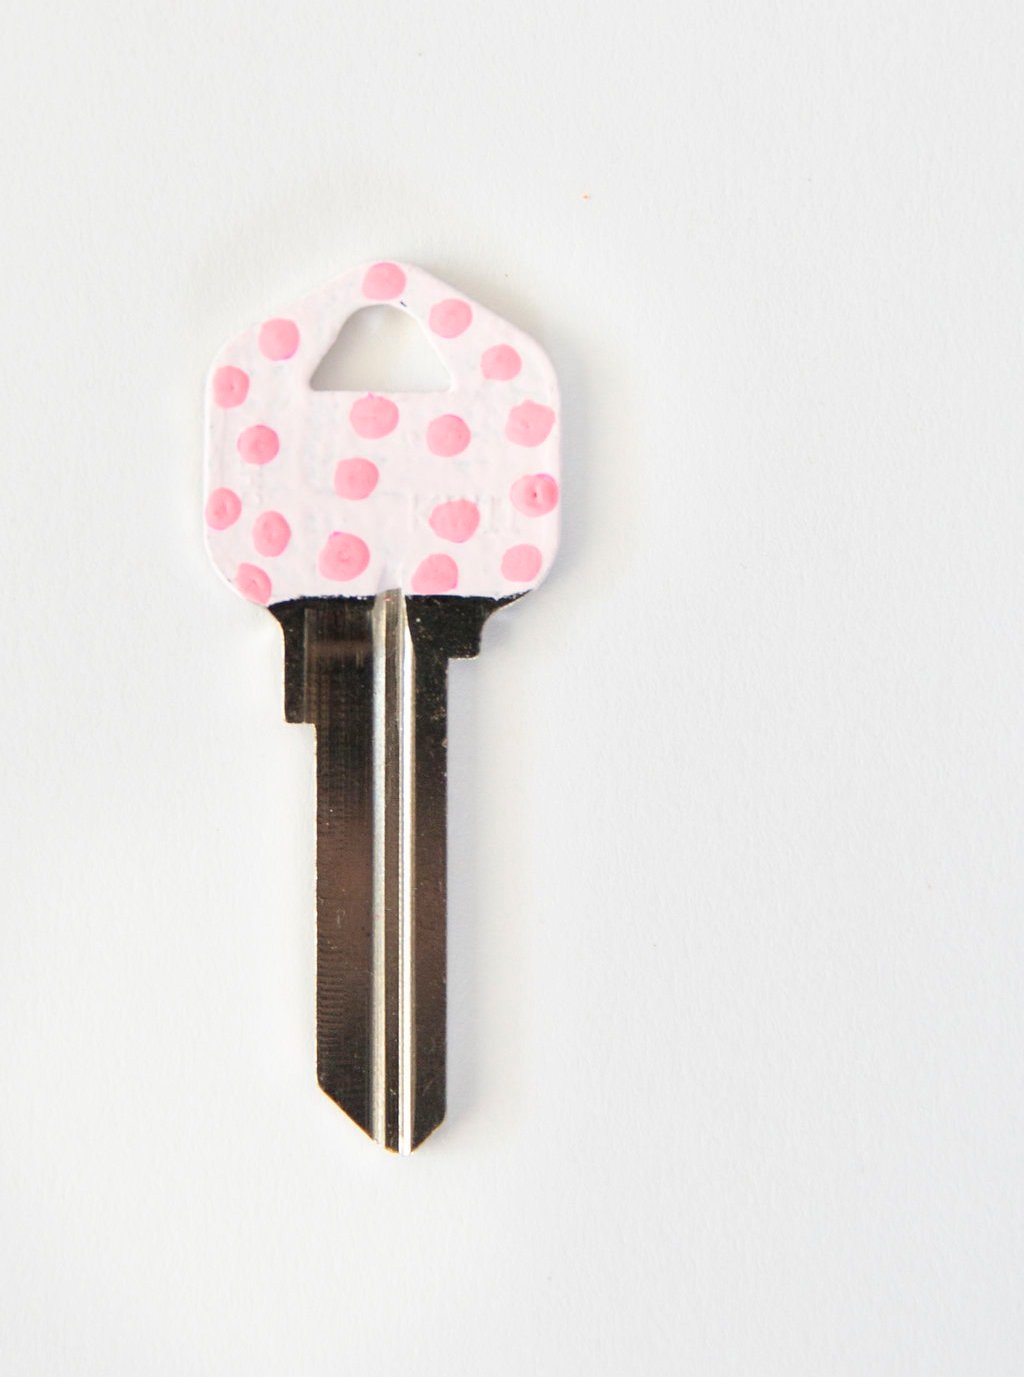
Don’t be intimidated! I promise this DIY challenge is NOT a daunting task. Grab your favorite paint and get the party started. Blast some Britney Spears or Carrie Underwood and make it fun! Heck, you could even grab a pint of ice cream while you’re at it and make a whole night of it! ;) Feeling intimidated still? Start with the polka dots. I guarantee if you can dot an “i” you can surely knock this one out of the park!
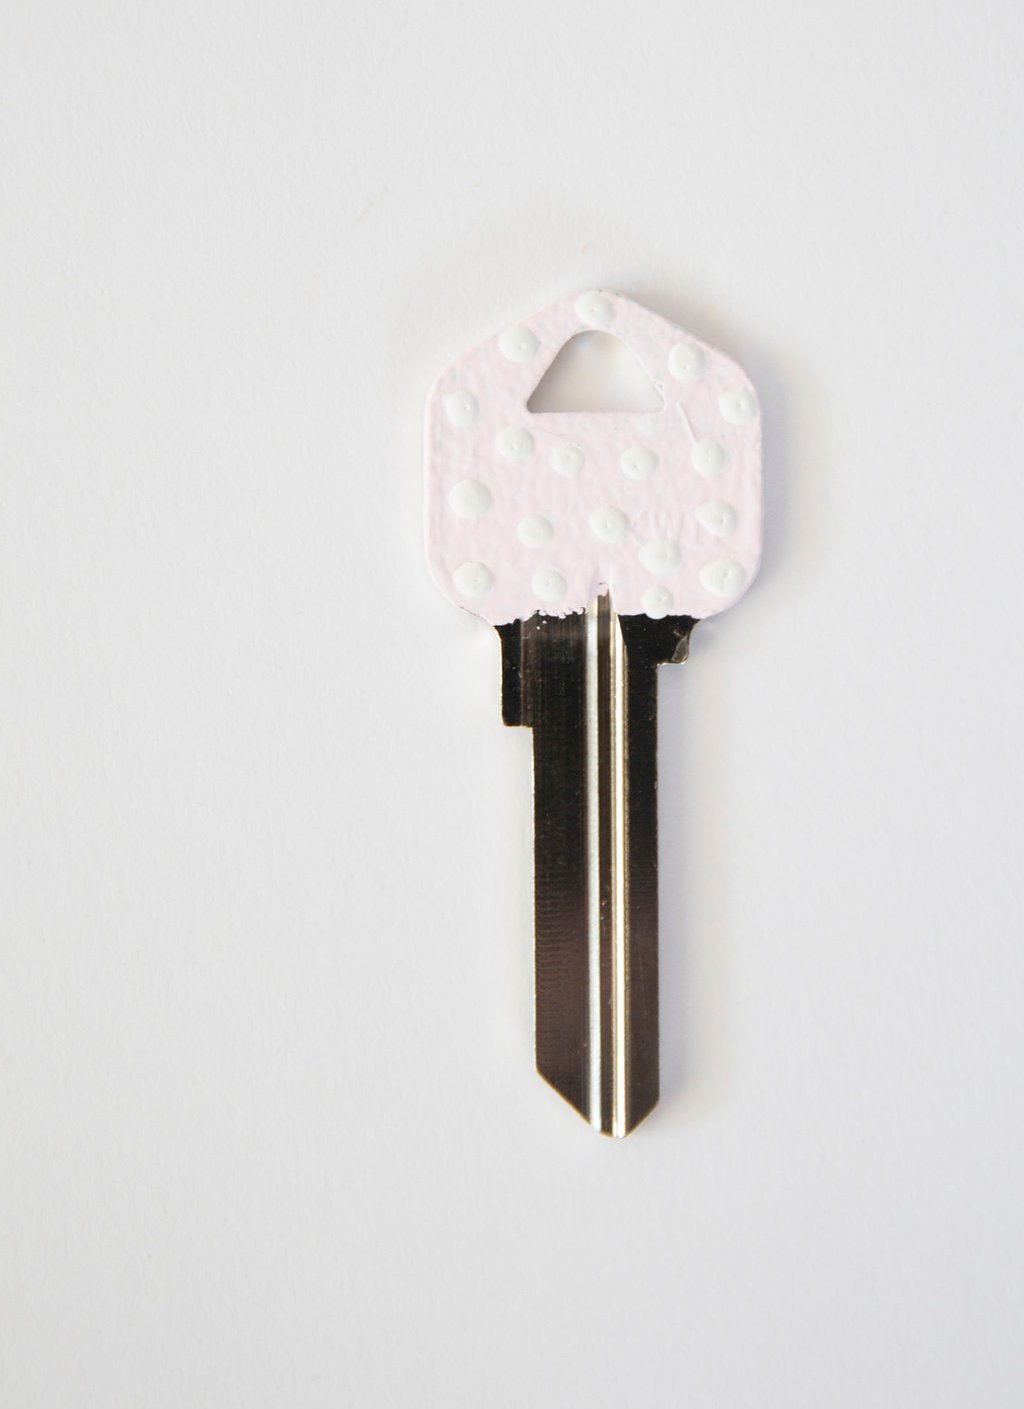

How To Make DIY Chic Painted Key Tops
MATERIALS:
- Keys
- Painters tape
- Acrylic paint in white, light pink, black, and green
- Small paint brush
- Extremely thin paint brush
INSTRUCTIONS:
- Using painters tape, tape across the bottom part of the key to make a straight line.
- Using a small paint brush, paint the key top light pink and let dry.
- For your polka dot keys, use your thin paint brush to add white and hot pink dots to your pink key top.
- For you dalamtion key tops, use your thin paint brush to add black dalmation spots to your pink key tops.
- For your palm leaf key tops, use your thin paint brush and green paint to paint a thin palm leaf design on your key tops!


Hey we are looking at about 500 keys with a few designs like the above for August 1st is that possible, let’s chat.
This was so fun to make and also so easy thank you for sharing this